Showing posts with label how to make masks. Show all posts

Monday, February 22, 2016

Making Another Goblin King Jareth Mask Part 1

My original Jareth mask has long since been sold, but I have had the mask up on a made to order basis on Etsy for awhile now. I get a huge amount of inquiries about how long it would take to have one made, but over the past few years I've been super busy and not really into the swing of things creatively. I've often shut down offers for a commission on one. Crazy, I know, but when you're not feeling it, you're not feeling it.

There was one person however, who was very adamant about getting a mask done. There was one hitch however in that they wanted a mask that was more accurate to the one in the movie, with that boney arm stick holder. At first I was a bit apprehensive as I know the original mask weighed more than I thought a stick could handle. I also wasn't sure how to securely attach a stick to a mask that has weight to it or what to use for a stick even!

The original Jareth mask

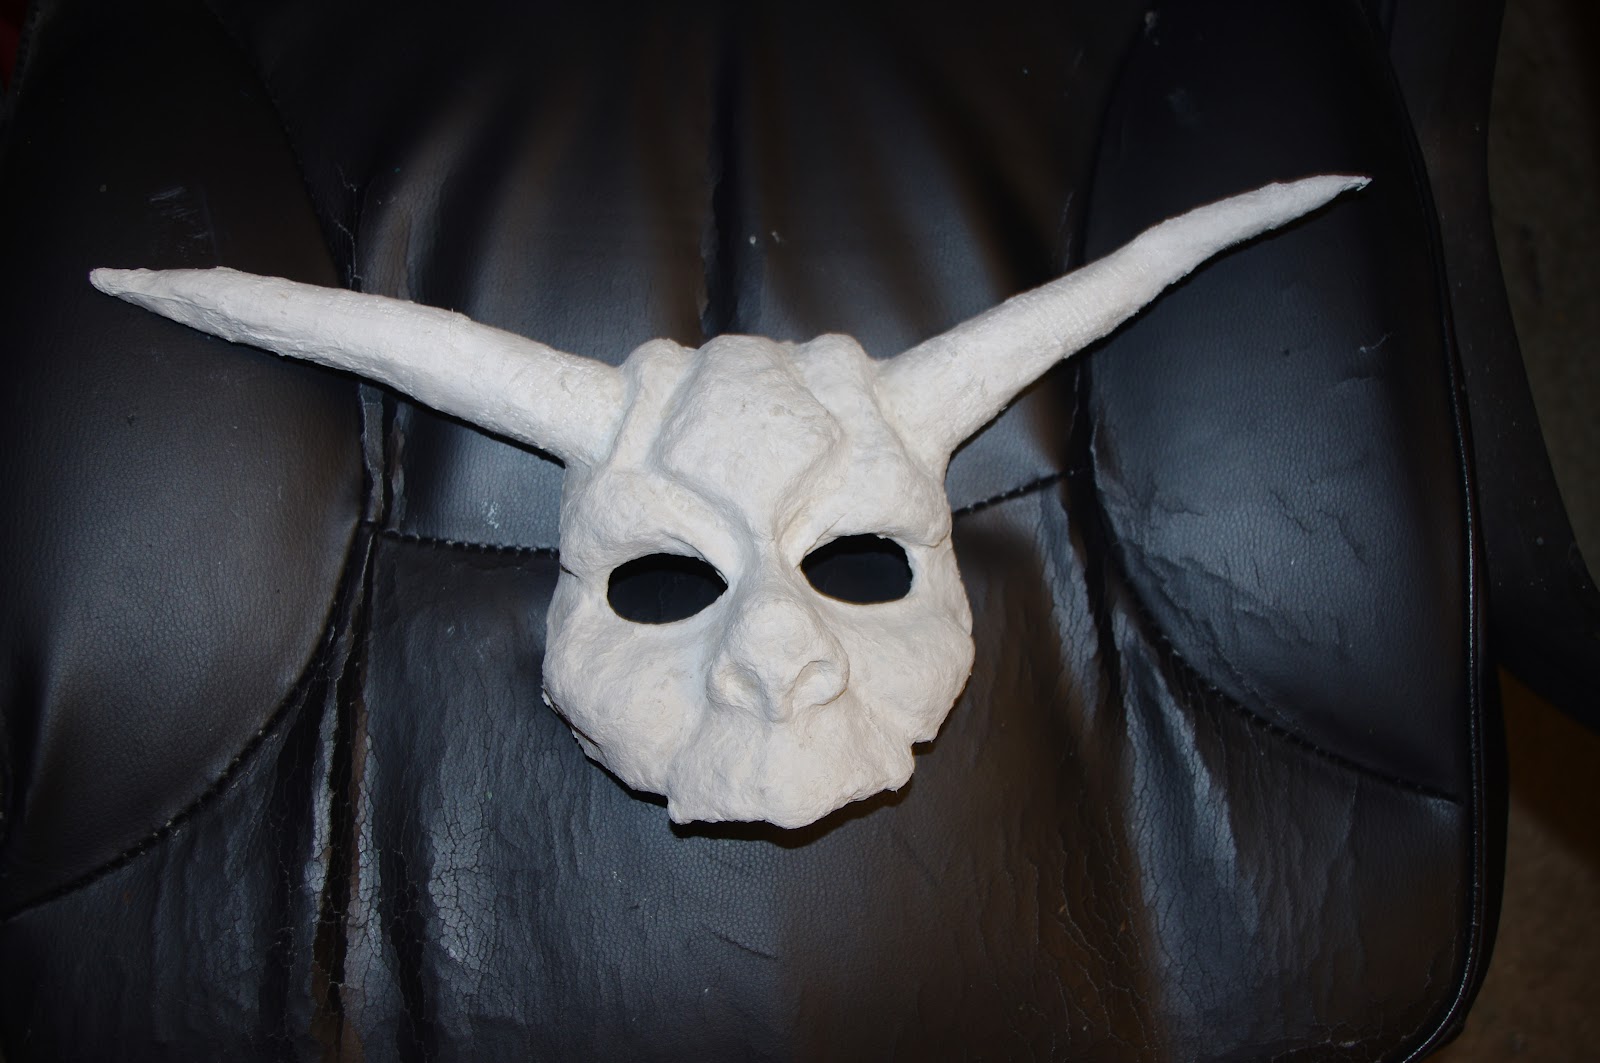
I decided I'd try to make the mask as light as I could, which proved difficult using the methods I prefer to create with. Still, I used thin layers of plasterwrap to keep the weight down as much as I could. I had to make a new horn mold because I misplaced the original one somehow. I was able to make the horn a lot thinner this time which was pretty cool not only for weight but accuracy.

I also tried a new sculpting compound for forming the shape on the mask, called Amaco Sculptamold. I can't say it was any easier to work with and it certainly came out just as lumpy as the Celluclay normally does. I have lots of sanding work to do on this one. I really need to find something entirely new that doesn't weigh a ton. I have tried Apoxie-Sculpt in the past year and it weighs a lot as well. All polymer clays weigh too much and paper clay always tends to crack on me. Totally open to all suggestions here!


Work in progress

In its current state, it's a lumpy mess, but the gesso + sanding will help that out. It would sure be nice to be able to skip that whole series of steps though. I attached the stick to the side of the mask first with hot glue and then further attached it with the modeling compound. I am likely going to go  over it again with some plasterwrap cloth pieces to ensure it sticks. I'm very nervous about it falling off. I searched for a ton of tutorials and could only find how to attach sticks to tiny little fabric masks, not something that weighs a pound or more.

I also opted for a thicker dowel instead of the thin one which would have looked better. I'd rather play it safe than sorry though and until I can get the weight down, it's just going to have to be this way!

Thanks for Reading and Happy Creating!
If you found this post helpful please share it with your friends! I also love a comment! You can get up to the minute updates by following me on Facebook by clicking here. 

Friday, March 23, 2012

How to Use Plaster Wrap Cloth for Mask Making

Last post I mentioned creating a post to show how to use plaster wrap cloth which is a very convenient method to make masks without the gunk and mess of using papier mache. I recorded the entire process of wrapping the cardboard frame for my Leviathan mask which was almost an hour total. I had to speed up the frames big time to make it fit under Youtube's 15 minute rule and so it's not quite an instructional video, but more of a time lapse to show you how you could use it and the general idea.


Because of this, I'll add in some basic instructions to go along with it. In my video I used a cardboard frame (see this post for details : http://mariemessina.blogspot.com/2012/03/how-to-make-cardboard-frame-for-mask.html) but you can also create one off of your face or on an armature. The bottom line is you need some sort of support for the plaster wrap to lay on before it dries.

What you'll need:
  • Plaster Wrap Cloth -- available at craft stores or @ Amazon Rigid Wrap Plaster Cloth
  • Scissors any kind will do but if you don't have any at all grab some here Soft Grip Scissors
  • a tub for warm water -- I use an old true (cool) whip container
  • a towel
  • a plate (paper is fine)
  • a surface to work on

Once you've decided how you're going to do your piece, the rest is very simple.

1. Take your roll of plaster cloth and cut a bunch of different sizes out. I do thick 1 inch pieces as well as thinner ones. I also do a bunch of large triangle shaped pieces. Put all of the pieces on your plate for easy access.

2. Fill your tub with hot water. By the time you're finished the water will probably be luke warm so might as well give it the longest go by starting hot. The box suggests warm water and I have definitely noticed that the material is more flexible when warm versus cold.

3. Set up you work area with your plate of plaster cloth, your tub, a towel and even keep your roll of plaster cloth and scissors off to the side in case you run out and need to cut more or need a specific shape. Make sure you keep your water and plaster well and separate because if you get water on your plate you will end up with hard patches all over your strips! The towel is usually well put between the bowl of water and the mask so that you can let excess water drip from the piece before applying if needed.

4. After that you're ready to go. Just dip a strip in the water and let the excess off on the towel. Place the strip on whichever surface and smooth it down with your finger. Make sure that there are little to no holes showing through the cloth and that you have a smooth white surface.

Thanks for Reading and Happy Creating!


If you found this post helpful please share it with your friends! I also love a comment! You can get up to the minute updates by following me on Facebook by clicking here. I'm also on Youtube now; please subscribe by visiting my channel here.

Tuesday, March 13, 2012

Revisiting the Labyrinth: Making a Ludo Mask Part 1


What is it about the Labyrinth that just gets my creative juices flowing? It might be that I watched this movie so much as a child and therefore a lot of the creatures formed this basis in my brain for creativity and creation. Foremost, it seems all of Henson's characters in the Labyrinth, aside from the humans, would make good masks! Think about it! Ludo? Excellent mask idea! A Firey (Chilly Down)? Heck yes (I actually have a Firey mask that is not too far along but in serious planning stages too!)!

To start I worked on making a horn out of polymer clay while studying a picture of Ludo. I have used regular water-based clay before but it almost always seems to break on me. I then have to dig out the rest of the clay and it's just no fun! The great thing about having a nice polymer clay horn is that I can reuse it over and over again too!

The horn getting ready to be baked

While the horn was baking it was time to work on the base for the mask. I knew I wanted to cut this mask off above the lips and went about making it accordingly. I don't have a lot of pictures of the in between process here because I moved along pretty quickly. But I started by making the shape on one of my armatures. I then realized by looking at Ludo's head and horns that I would need to add an extension to the forehead to pin the horns too. I cut out some cardboard for this and in many series of letting the plaster dry and then adhering on top of it, got the horns and everything put together.


Kind of reminds me of a witch doctor!
The big problem I had once this was all said and done, was that it was kind of flimsy in between the horns on each side of the forehead. I ended up reinforcing the whole frame of the mask as well as the horns and forehead with some wire. This went very well, but next time I will not go with the figure 8 shown below and will instead stick with the edges and through the horns. I will have to spend some time making the wire flush with the surrounding mask or else it's going to dig into your forehead. Sometimes I wish I'd think of these things ahead of time, but a lot of creation is trial and error!

Wire frame added for support
Now for the biggest hold up on this mask!! I've got my total base ready to go now for the most part and the only thing I can think of, even though I have plenty of sculpting yet to do, is of Ludo's muppet hair. I must have spent 5 hours alone just researching the different furs available out there. I started by looking up shag fake fur and could only find people selling the right color in yards for $30 or more! I would find smaller bits on etsy but never the right color. I looked into dying my own faux fur and found that apparently the only way to die dark colors in acrylic fur is very toxic and not suggested for beginners. Lovely!

I finally found a solution in the most unlikely of place: fly fishing! Yes, that's right... fly fishing. There is more variety in color for fisherman to choose from then there is for crafters to choose from! I found the perfect color, orangutan rust, in a brand called Psuedo Hair. It's not quite the right texture so much as the Mongolian shag I found was, but at least I don't have to spend $30 for it, more like $3.50 which is way more affordable! I also found another brand called Extra Select that has a finer version of this fur that I will be using for my Firey mask.

Orangutan Rust Pseudo Hair
So now I'm waiting for my order of fur to come, and will work on sculpting the facial features onto the mask base in the meantime. I'd like to get this done either by next week or the week after.


Thanks for Reading and Happy Creating!

If you found this post helpful please share it with your friends! I also love a comment! You can get up to the minute updates by following me on Facebook by clicking here. I'm also on Youtube now; please subscribe by visiting my channel here.

Friday, March 9, 2012

How to Make a Cardboard Frame for Mask Making

This was pretty busy day and so at 3:30pm I am just now getting to writing my blog post! I have been working on creating a pretty complex frame for a mask concept. I am part of a group on Facebook with a lot of cool and talented artists and each month we have a theme that we vote on. This month the theme was blue and so I thought I would work on a blue mask. I had a lot of trouble coming up with an idea, but after much thought, decided to work on a Leviathan mask. Leviathan is in many different myths from Biblical to Babylonian to Greek. It's depicted usually as a dragon, but the game Final Fantasy turned it into a sort of sea serpent. This is the version I'm going with and more specifically the model used from Final Fantasy VIII (8).

Leviathan Statue from FF8

As you can see, this is far from the simplest design I could have picked, but the thing I love most about mask making is the problem solving part! There are many ways you can do them and figuring out how is so fun -- for me at least.  Let's get started on making a frame!

What you'll need:

So, I started by breaking down the model on this statue that was released for the game. You can see the parts of the face: a diamond shape in the center, a sharp tip and almost rectangular sides, a central fin, and 2 big wings on both sides. Adapting it to a human face is something you just have to make judgement calls on. The way I do it may be different from how you would do it. For the base part of the face, I came up with a pattern that looks like this drawn on cardstock and cut out. Make sure you label them too so that you don't get confused later.

The frame pattern on cardstock


I got this shape by trying it on continually. The cardstock is also very flexible so you can wrap it over your face easily. Check your eyeholes, check that everything looks right before continuing on. If you have a friend, it really helps to try it on them too! Tape it to their face and make sure everything looks exact!

When you're done, trace the patterns out on some cardboard. For this specific pattern and because the beak is so sharp of a point, I wanted to use a material that would not get flimsy when wet like cardboard does. I used the back of a picture frame (I think it's made of chipboard) to cut out the central shape for this reason and it is not the easiest thing to do. I went back and forth between the xacto knife, the scissors, and my husband's pocket knife! For any piece that you want to be easily mold-able, use the cardboard. Keep in mind, that the cardboard you trace this pattern onto will not be as flexible as the cardstock until wet. Also, make sure you use your Xacto knife to cut the cardboard. It work way better than the scissors!

Main frame pieces cut out in cardboard and chipboard


Once it's all cut out, you can start to shape it a bit and tape it in place with your masking tape. I use masking tape because if you screw up, then you can easily take it off. It's good for temporarily holding as well - like when you're tracing. Do the same thing you did with the cardstock pattern, and squish and bend the cardboard to make it fit right. But don't worry too much about it being rigid, as I mentioned before that it will loosen up quite a lot when you add your material to it (papier mache or plaster wrap cloth). To keep the cardboard from jutting out on the sides, I kept it taped with a long piece of masking tape in approximately the right shape.

Next, I made the central fin pattern, and traced that out on cardboard two times. I fitted it and cut off any excess. You find that making your own patterns is a lot of trial and error. I had to cut a little divot in my fin pieces because of the dip in between the V shape at the top of the head. Once it was all secured, it's now starting to look more like Leviathan! 

Central fin attached

I'll now go on to follow the same routine to make the wings on both sides of the helmet style mask. You can use this method to bring just about anything to life, but it is especially helpful for hard, straight edges -- like the pointy beak, fin, and wings. You can always build upon it as well with something like celluclay as I will with this mask to work in details. Once this mask is finished, I'll be sure to link to it here so you can see the finished piece.

After writing this post, I'm realizing that I still haven't explained how to use something like plaster wrap cloth or paper mache to cover a frame like this and make a mask. I'll be sure to write that for you guys next week and I can even use this mask to show you!


Thanks for Reading and Happy Creating! Please leave a comment if you have a moment!

If you found this post helpful please share it with your friends! I also love a comment! You can get up to the minute updates by following me on Facebook by clicking here. I'm also on Youtube now; please subscribe by visiting my channel here.

Friday, March 2, 2012

How to Create a Round Beak or Feature for Your Mask

There may come a time, sooner than later, where you realize that it is not so easy to make every feature you had dreamed of out of clay or cardboard to mold over. While I was attempting to make a rounded beak for my Owl Mask, I tried cardboard and just couldn't get the right shape (not to mention it would have gotten soggy when wet which would have warped the shape either way). So after spending 4 hours of my day trying to make this rounded owl's beak, I finally found that this method worked the best.

Making an Armature out of Aluminum Wire and Super Sculpey

I've added product links to both dickblick and amazon so if you have a place you prefer to shop you can choose either one. I know I bounce back and forth myself!


What you'll need:
12 gauge aluminum wire  Sculpture Armature Wire or Aluminum Craft Wire
Super Sculpey @ DB or Super Sculpey @ Amazon
tinfoil
small pliers
scissors (to cut wire)
paper towels
rubbing alcohol (for smoothing)
sandpaper (rough and fine)
an oven.

Step 1: Make the basic frame for your shape

This is the hardest part! I have tried this with thinner wire and it was impossible. I have also tried it without pliers and it was equally impossible. Don't worry too much about exactness here as a lot of the excess shape can be sanded off. Use the pliers to crimp the wire down firmly where it connects.


Step 2: Cover your frame with wireform

This can also be hard depending on the shape. Try to keep the wireform as flat as you can so it doesn't crimp up in unwanted sections - like it did on mine! Use the pliers to clamp down that wire around the edges. You can use them to flatten a bit too if needed.


Step 3: Cover your finished frame with Super Sculpey

The easiest way to do this is to eye about enough to cover your frame and work it in your hand until it is soft. Then roll it out with a rolling pin so it's nice and even. Don't roll it out too thin so that you have room to sand. Place the rolled out sculpey over the frame and press it up under the edges. Make sure all underneath the frame (the part nobody sees) is nice and tight by pressing it firmly; make sure the sides are how you want them to look for the most part.


Step 4: Smooth and bake your feature

Use some wadded up paper towels doused in rubbing alcohol to smooth out your shape. When you've got it about right, get some tinfoil to make a wad big enough to support your piece in the oven. Especially if your shape has a point like mine did, you will need it to be perched off the surface and kept from rolling around! Follow the directions on your sculpey package for temperature and baking time.


Step 5: Sand it

Once it's done cooking, let it sit for awhile before touching it. I have touched sculpey too soon and it will actually crack so to be safe, just let it be for a few hours before you try to sand it. I used 120 grit sand paper to sand my beak into perfection. The frame originally had some lumps so it was nice to be able to just sand them off the top part. Use a circular motion to keep it level and even. I finished it with some fine grit sand paper.


Step 6: Seal and decorate

Seal your beak with whatever you have available. I used some clear coat acrylic paint, others like to use polyurethane, but they both do the same thing. You can even seal it with gesso if you need the base to be white for painting. I painted mine silver and mounted it to my owl mask. There may be an easier way to do this that I have yet to discover, but for now this is a simple enough method of getting the job done.

Thanks for Reading and Happy Creating!


If you found this post helpful please share it with your friends! I also love a comment! You can get up to the minute updates by following me on Facebook by clicking here. I'm also on Youtube now; please subscribe by visiting my channel here.

Wednesday, February 15, 2012

Labyrinth Inspired Goblin King Mask Part 2

This is part 2 of this post series - please check here to see part 1 if you haven't already read it.  


It's taken me forever to finish this mask partly because I've been working on several at the same time and also because I was very particular about the sculpting process. I also had to go through ordering a new Dremel after trying to find a replacement battery charger for a week or so! For better or worse. it's finished now! I don't have as many pictures as I'd like to have, but I can explain through the rest of the process.

I ended up covering the mask with modeling paste to smooth it out a bit more, and then painted a couple layers of white gesso on as well. Once all was dry I sanded it (with fine paper) and started painting in my actual colors. It was funny to use painting techniques I would usually use on a canvas, on a 3d surface!


I had already decided to make this mask more like that of worn copper. I wanted it to be very metallic as well. I mixed several colors for the facial part of the mask,and used a metallic gold/ brown color for the horns. Once these layers were set, I went in and added my shading which I used dark brown for on both accounts. In the below picture, you can see the difference in the horns, where the right horn has been shaded with dark brown while the other is still that bright gold color.


Once all of the coloring had been completed, I painted on a layer of matt varnish. And finally I found out why you have to wait 24 hours between layers or even before trying to do any work with it. Varnish takes forever to dry! And it's awfully sticky stuff! I was trying to do too many things at once because I was in a rush to get this blog post up after being sick, but I soon found that I couldn't rush it as this varnish even after 3 hours was still sticking to everything. So make sure you let your varnish dry! For future reference, I may just invest in some clear coats of acrylic paint so that I don't have to use varnish anymore for finishes.

Once the varnish finally did dry, I was able to attach some nose pads along with the felt lining and the elastic headband. You quite literally have to do this all at the same time and it can be a pain. When all is said and done, I really like the way this mask turned out. It has a personality of it's own which is what I like to go for with inspired masks. Not necessarily a direct copy, but a close brother of the Goblin King.


Thanks for Reading and Happy Creating!


If you found this post helpful please share it with your friends! I also love a comment! You can get up to the minute updates by following me on Facebook by clicking here. I'm also on Youtube now; please subscribe by visiting my channel here.
 

Tuesday, February 7, 2012

Part 2 of Creating a Bird Splicer Mask Inspired from Bioshock

This is part 2 of this post series - please check here to see part 1 if you haven't already read it.


Next week I'll be concluding Jareth's mask, but I just couldn't get it done in time for today's post, so I'm finishing up the Bird Splicer mask from Bioshock instead. 

Showing how to sew sequins last week led up to what I did next for this mask which was creating the sequined felt cover. I basically followed the steps from my video to cover an entire mask! It took a great deal of time; I was up from 10pm to 5am working on it one night and then finished it the next day in about 3 hours. So about 10 hours total to finish just this part of the mask. 

The sequined mask in progress

Once that was done it was time to gesso and paint: my favorite part! I gessoed the entire mask, every inch of it. Mainly because nothing sticks to plaster or clay, but it you gesso it, paint or glue will stick to the 'teeth' of the gesso. I then started to paint the feathers and beak a nice light brown called "Goose Feather." It seemed appropriate!


I had to paint several layers of this color before it got the right level of depth and then I covered that with 2 layers of a satin varnish so that it would shine. The bottle said to wait 24 hours between each layer of varnishing. I'm not sure why or if you absolutely have to, but I did anyway. It made progress on the mask SO SLOW though!

After the paint and varnish was finalized, the next step was to add all of the feathers to the back of the mask so they would stick out through the solid feathers. I just used a hot glue gun to do this adding a thin layer of down and then glued the larger Guinea quills over that. I layered about 3 of the quills in each section to give full coverage as well as a tapered effect. 

Then it was time to attach the felt lining to protect the face on the inside of the mask. I copied the outline of the original sequined mask at the top, but left some room to work with in case I had to trim it. The eye holes were cut out and then I started to attach it by hot gluing the mask starting at the eye holes. Then the sequined mask went on the front and after all fitting and touch ups we had almost a finished mask!


The only thing left to do, which was my one big goof up in this whole process was to find a way to wear it. Yes in all my excitement, I totally forgot to make holes on the sides of the mask! Honestly though, with the weight of this mask, about 1.4 pounds, the velcro fastenings I ended up using were the best bet. I made a 3 point harness of sorts which makes it attach very comfortably to the head. You can move around very freely in it and the velcro is very secure. I also added some foam to the point under the beak where it sets on your nose as it was a little uncomfortable without it on the bridge of the nose. 

3 point harness to wear it

This piece is now available for sale on Etsy HERE or you can contact me directly for purchase. I would be able to fully customize this mask with different color compositions. I am going to be starting another one, that is more owl-like, with a black/ white/ silver color theme as well. 

Thanks for Reading and Happy Creating!


If you found this post helpful please share it with your friends! I also love a comment! You can get up to the minute updates by following me on Facebook by clicking here. I'm also on Youtube now; please subscribe by visiting my channel here.
 

Tuesday, January 31, 2012

Creating a Bird Splicer Mask Inspired from Bioshock Part 1

I wanted to continue my post on the Labyrinth mask I am working on, but unfortunately I just wasn't able to get enough work completed on it to fill a post. I'll save it for next week and this week I'll go over the first part of my Bird Splicer mask I'm making inspired from the game Bioshock. I started this mask not long after my Labyrinth mask; it soon becomes apparent in mask making that you will be working on multiple masks at the same time!

When I was making this mask, I didn't know I would be making a blog about mask making, so sadly I don't have many pictures of the original stages. I started the mask with another simple plaster cast of my face but added some cardboard frills! I made the shape of the beak I wanted from the side and drew it on cardboard. I cut out the two sides and glued them together, bending it where I wanted.

You can attach any cardboard pieces with plaster wrap as well as wrap the cardboard to make it sturdier. It will get loose from the moisture at first, so you will have to hold it until it begins to firm up. The cardboard also becomes very pliable at this point, so if you wanted a more organic or rounded shape, not is the time to do it.

Still attaching the pieces

Once the beak was attached, I started with the feathers on the rear side of the mask. This is not meant to be an exact replica of the mask worn in the game and so I had initially wanted to leave the back feathers out. But I found in my homework that the back feathers actually help to balance the the large beak in the front and so I decided to add only half of them.

When I was done with adding all of the features, I realized that there were way too many rigid edges and this mask, the beak especially, needed to be smooth and shiny! So, I thought of using celluclay, but after a quick experiment, found it wouldn't be what I needed. I moved onto the Original Sculpey polymer clay I had purchased for just such needs! If you've never used polymer clay, it's definitely different, but the major thing you need to know is that in order to smooth it, you use isopropyl alcohol. You can use any normal clay tools as well, but I find paper towels and alcohol works best.

Nice and smooth beak

 I covered the entire beak in a rolled out sheet of sculpey as well as the feathers. Once everything was secured and set the way I wanted it, I prepared to bake the clay so that it would harden. This specific clay bakes at 325 in the oven for 15 minutes. From what I read, there are no toxic gases released during the baking process, so I used my own oven. Others tend to use separate toaster ovens specifically for this purpose. Make your own decision on it.

In the oven - ready to bake
Once it was done baking, I let it cool for awhile. The next step was to sand down the rough edges and gesso everything in preparation for painting and hot gluing items onto it later. The next step was to sew the sequins onto the felt which will eventually cover the facial part of the mask. Sadly you'll have to wait until next Tuesday to see the progress on this mask, but this Friday I'll show you how to sequins!

This piece is now available for sale on Etsy HERE or you can contact me directly for purchase.

This is part 1 of this post series - please check here to continue reading part 2. 

Thanks for Reading and Happy Creating!


If you found this post helpful please share it with your friends! I also love a comment! You can get up to the minute updates by following me on Facebook by clicking here.

Friday, January 27, 2012

How to Make Your Own Armature for Mask Making

There are a few ways you can make an armature, but before I get into them, how about I explain what an armature is first! An armature is technically the framework around which your mask or a sculpture is built. In maskmaking it is used to sculpt on and then the mask is removed so the armature can be used over and over again. The benefit of using an armature is not having to buy pre-made half or full masks to work from and/or not having to use your own face as a model every time you need to make a new mask!

So without much ado, here is one method you can use to make your own armature.

Plaster / Plaster Method

 This is the easiest way in my opinion and will give you a decent armature. It will not be as detailed as an alginate molded armature would be, but it's good enough to get the job done! This method involves wrapping your face in plaster wrap cloth. You can get this at most craft stores; I know Michaels and AC Moore both carry it. It's usually called Rigid wrap or Art Minds Plaster Wrap. The package will have detailed directions, but it's basically just about cutting out strips and dipping them in warm water and then applying them to your face. I use vasoline to cover my entire face, but some just use it over their eyebrows and any hair.

You'll want to get a straw and cut it into a couple small pieces which can be inserted into your nose as everything else will be covered by the time you're done and you'll need to be able to breathe. Always start with an x over your nose/brow as the package will indicate. Make sure that the mask is solid with at least 3 layers of wrap. The other important thing is to make sure you keep your face relaxed. Try to avoid laughing! Pursing your lips a little helps as well to get the shape of them.

This is how your face should look when you're done.
You don't have to wait too long before taking this cast off. By the time you're done with the last layer the first layer will be well on it's way towards being dry which usually takes about 20 minutes total. You will be able to tell if you can safely take it off by how stable it feels. Some have said to wait until it feels itchy but I have never had that sensation - plaster is ALWAYS itchy to me!

So when you think it's ready just start to move your facial muscles around. Make funny faces, scrunch your cheeks upwards, and furl your brow! It should come off pretty easily. Don't put the plaster wrap away yet though because you're not done with it yet. You'll have to build up the edges a bit so that liquid plaster will sit in it and so that it will lay flat on your desk/ surface. I used a $3.00 Full face mask I bought at AC Moore and tried to match it as best as I could and keep the edge even. Make sure to cover the nose holes as well. When you think you've got it go ahead and let it dry.

Get a small box that your mold will fit in and line it with crumpled up newspaper. Before you start mixing your plaster, insert your dry mold into the box with the face side down. Line it with lots of vasoline and get into all of the creases. Now get your Plaster of Paris (hardware store) and mix enough to fill the mold. I think I used 4 or 5 cups of plaster for my face mold.


Pour the plaster into the mold very slowly until it's all in! Make sure that mold is level! And when you're done pouring tap the edges of the mold to get rid of any excess air bubbles that might be hiding in the plaster. Let it dry - it will take a good 30-40 minutes so just go and do something else.

Once it's dried, depending on the shape of your mold, you may be able to just take it out of the mold. Or if you made the mistake I did and made a dip in your mold, you will have to peel your mold off of the armature, ruining the mold. This is how it should look when it's out though! You can know make future masks off of this armature instead of having to get your face all mucky every time!

Armature from plaster/plaster method.

The plaster / plaster method works well, but if you want a really detailed armature, the best way to go is with alginate. I'll cover how to make an armature out of alginate next  Friday and once all of the methods are completed I'll link them all together for easy reference.

Thanks for Reading and Happy Creating!


If you found this post helpful please share it with your friends! I also love a comment! You can get up to the minute updates by following me on Facebook by clicking here.

Tuesday, January 24, 2012

An Introduction to Mask Making and the Goblin King Pt 1 (Labyrinth)

An Introduction

Some of you may know me from my paintings. I used to keep up more of an blog face for Messina Studio, but have lately kept it to facebook updates and a website. I don't think I really enjoyed blogging about the painting side of art because most of the process is done behind closed doors between me and the painting, and without a video camera, it's hard to really ever get into it on a blog. I'm also not one to speak for any great length about a painting, or art for that matter. I've always been pretty blunt and to the point. I like it - I don't like it - I really like it - I like this color they used - etc. But I'm not going to go on and on and write lengthy blog posts about it. 

So you may be wondering what I'm doing here then? Well, I have found a new interest, and since I just started a week ago, you're not too late in joining me for the ride. I am doing a painting series on masked figures, called Veiled Intentions, and in doing so I spent a lot of time looking around on Etsy at different types of masks. I realized that the ones I really fancied were ones that I could never afford to buy in the $400-1000 range and so a thought dawned on me. What if I tried making my own?

Mask Making

I did...a lot of research..and I mean a lot! Here are just a handful of the links I've accumulated. Check them out for yourself if you're interested as I won't cover everything in this post.

Mask Making Ideas and Instruction
Different Papier Mache Methods (Pulp, Paper Strip, etc)
More About Making a Plaster Mask (Plaster Masks are good templates)
Papier Mache Resource (Has lots of great info- search the forums)

The Goblin King

The first mask that I wanted to try was based on the one that Jareth (David Bowie's character) wore at the masquerade in the movie The Labyrinth.

The Goblin King

I decided to go with making a plaster cast of my face to build on.  Once I had the basic shape of the mask, I let it dry and had no problem taking it off of my face. I realized pretty quickly that I wouldn't be able to get the shape I wanted with the plaster wrap alone. Then it was time to start doing some research on what to sculpt with. I told you there was a lot of homework involved! There are a lot of choices which is good but also makes the task arduous (I know..what kind of person uses a word like that on a blog..lol).

I decided I wanted to use a sort of paper pulp or paper clay to sculpt with but I couldn't find what I needed at Michaels (local craft store) and ended up getting Celluclay. This ended up not being such a horrible thing - Celluclay only needs some warm water added to it and it's very easy to sculpt with. I'll get more into this later. Here are some of my early pictures of the mask.

The first basic shape and layout of the mask.
The Celluclay has one downfall though if you apply it too liberally, it gets lumpy when it dries. I put it on pretty thick to make the bulges, so it got super lumpy on me! The good thing about Celluclay though is that it can be sanded. This helps to an extent, but you will most likely have to do some more to smooth it out.


 To add the ridges to the horns, I used para-cord paired with a glue gun and then used plaster wrap and celluclay accordingly to shape it up. I also had to fill in some of those lumps with more celluclay. I also added some little flaps off the side of the mask. This can be done easily by mixing card stock and plaster wrap together.


 Finally! It's starting to look a lot better! This was taken after I had sanded down the last layer of celluclay and added a full layer of gesso to the whole front of the mask. Some people suggest using a mix of string gel and modeling paste, but I know I can sand gesso as well, and until it's smooth enough that I think I won't want to sand it anymore, I won't use that mixture.

Since I didn't shape the mask perfectly the first time I did it, I've had to go back with a Dremel (hand tool) and drill/sand off the edges underneath the nose. Wouldn't you know that the battery died on the Dremel and I can't find the battery charger anywhere! They are also not available for sale anywhere unless you want to pay $50 on Ebay which really sucks. I will have to find another way to get it shaped the way I'd like - maybe just a lot of sanding.

After this whole experience, I found that I REALLY enjoy making masks! I think the most rewarding experience is working with my hands and creating something out of nothing. It's an amazing feeling and I think I'll be sticking with it! Keep an eye out for Part 2 of this post where I'll show the finished mask and painting it to look like tarnished bronze.

Thanks for Reading and Happy Creating!


Please share this post if you like it and follow me on my Facebook page - Marie Messina Art -  where you can see updates on both my paintings and my masks.