This is part 2 of this post series - please check here to see part 1 if you haven't already read it.
Wow, it's certainly been a long time! Over 2 years later, and I'm picking up this mask and continuing where I left off. While I did focus on painting for awhile, I've since found myself in quite a rut with it and so I'm diving back into masks. I also sold my
Jareth mask this month, and sales always boost my confidence. I've been working with a bunch of new materials and thus have a ton of tutorials planned.
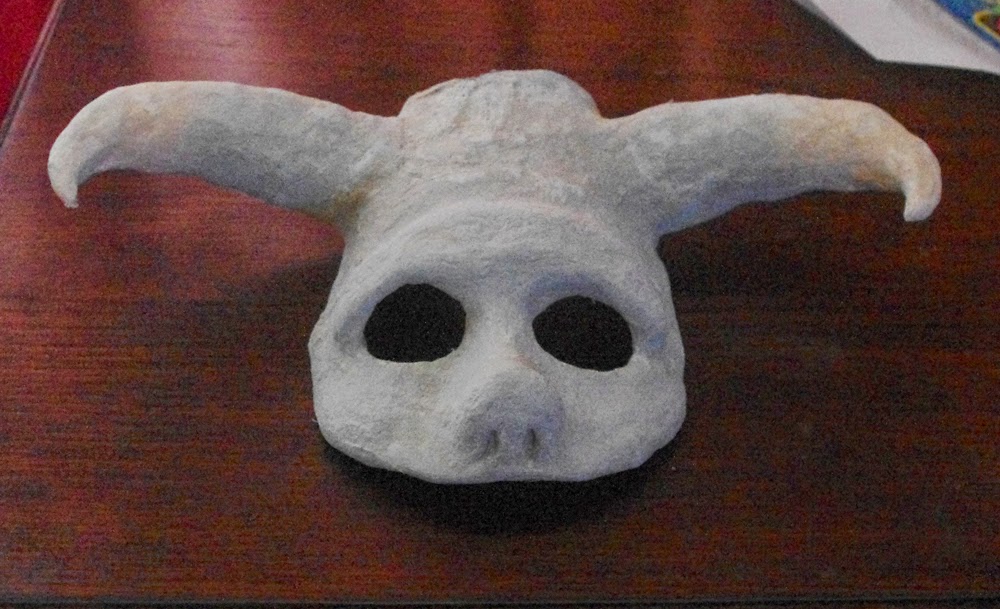
Back to the matter at hand: Ludo! I was a little confused at first as I've been out of sculpting for so long, but decided to go with my tried and true
celluclay to start molding Ludo's brow. Something I had never considered originally, was Ludo's nose. He has an almost dog-like nose which doesn't really mesh well with the size of a human nose. I considered leaving it out and just keeping it the human shape, and then though, whatever this is an adaptation - it doesn't have to be identical! I'm keeping the dog nose!
 |
| The resulting brow and doggy nose. |
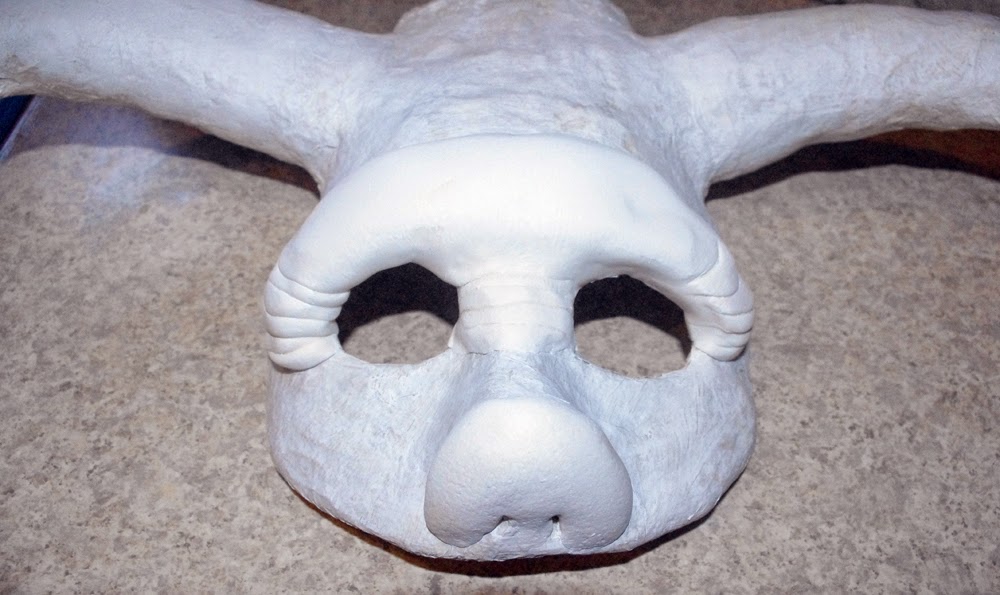
Another problem I ran into at this point was that I was just not confident in the cellulclay's ability to make the specific shapes I wanted for this mask. I planned for grooves on the nose, I planned for a better brow. This wasn't cutting it. And I will say again, Celluclay is an amazing product, but fine detail is not it's fortay. So, now I'm thinking, what can I use that's lightweight, but durable. I did some research and found a good number of options.
One thing I found was 'old-fashioned' paper mache, which uses tissue paper and glue. I did a couple of layers onto the mask to see if it would offer up what I needed and while it added a great texture and did smooth up the celluclay, it wasn't going to give me the rise I needed quick enough (and two layers was quite time consuming).
So, I opted to use
Sculpey Ultralight. I made up a new brow for Ludo with a bunch of nice wrinkles and creases. I made the creases over the bridge of his nose, and added some nice shape for his nose. After all the finishing touches were completed, I put him in the oven to bake.
 |
| Luuuuudo....baked? (in the oven!) |
After Ludo baked, I let him cool and proceeded to sand everything down. Now it's time for the fun part! Painting and finishing up the details. And this mask has a huge detail that I just couldn't wait to use!! I loved the texture the paper mache added to the horns and cheeks. In hindsight, I would have liked to go over the brow with the mache too to make it look more uniform. It's almost too smooth compared to the cheeks here.
 |
| The base colors blocked in. |
So onto that huge detail I was talking about! From part 1 of this post I mentioned finding this really cool hair in the perfect shade for Ludo. Now it's FINALLY time to use it! I had to cut the swatch I had to fit around the horns, but it came out so awesome. The color is perfect and it looks great on the mask. My husband and I joked that Ludo had the original emo hairstyle xD!
 |
| Ludo with hair! So cool!! |
And all the hard work was done! I did some touch ups on the horns and spots I missed paint. And sealed this beauty up. The inside of the mask is lined with flannel for comfort and it's attached with elastic. For as many details as this mask has, it actually came out very light - so I managed to meet my goal! This mask is for sale on my
etsy shop - please head over and take a look :)
 |
| Finished Ludo Mask |
Thanks for Reading and Happy Creating!
If you found this post helpful please share it with your friends! I also love a comment! You can get up to the minute updates by following me on Facebook by clicking here. I'm also on Youtube now; please subscribe by visiting my channel here.
