Showing posts with label goblin king. Show all posts

Monday, February 22, 2016

Making Another Goblin King Jareth Mask Part 1

My original Jareth mask has long since been sold, but I have had the mask up on a made to order basis on Etsy for awhile now. I get a huge amount of inquiries about how long it would take to have one made, but over the past few years I've been super busy and not really into the swing of things creatively. I've often shut down offers for a commission on one. Crazy, I know, but when you're not feeling it, you're not feeling it.

There was one person however, who was very adamant about getting a mask done. There was one hitch however in that they wanted a mask that was more accurate to the one in the movie, with that boney arm stick holder. At first I was a bit apprehensive as I know the original mask weighed more than I thought a stick could handle. I also wasn't sure how to securely attach a stick to a mask that has weight to it or what to use for a stick even!

The original Jareth mask

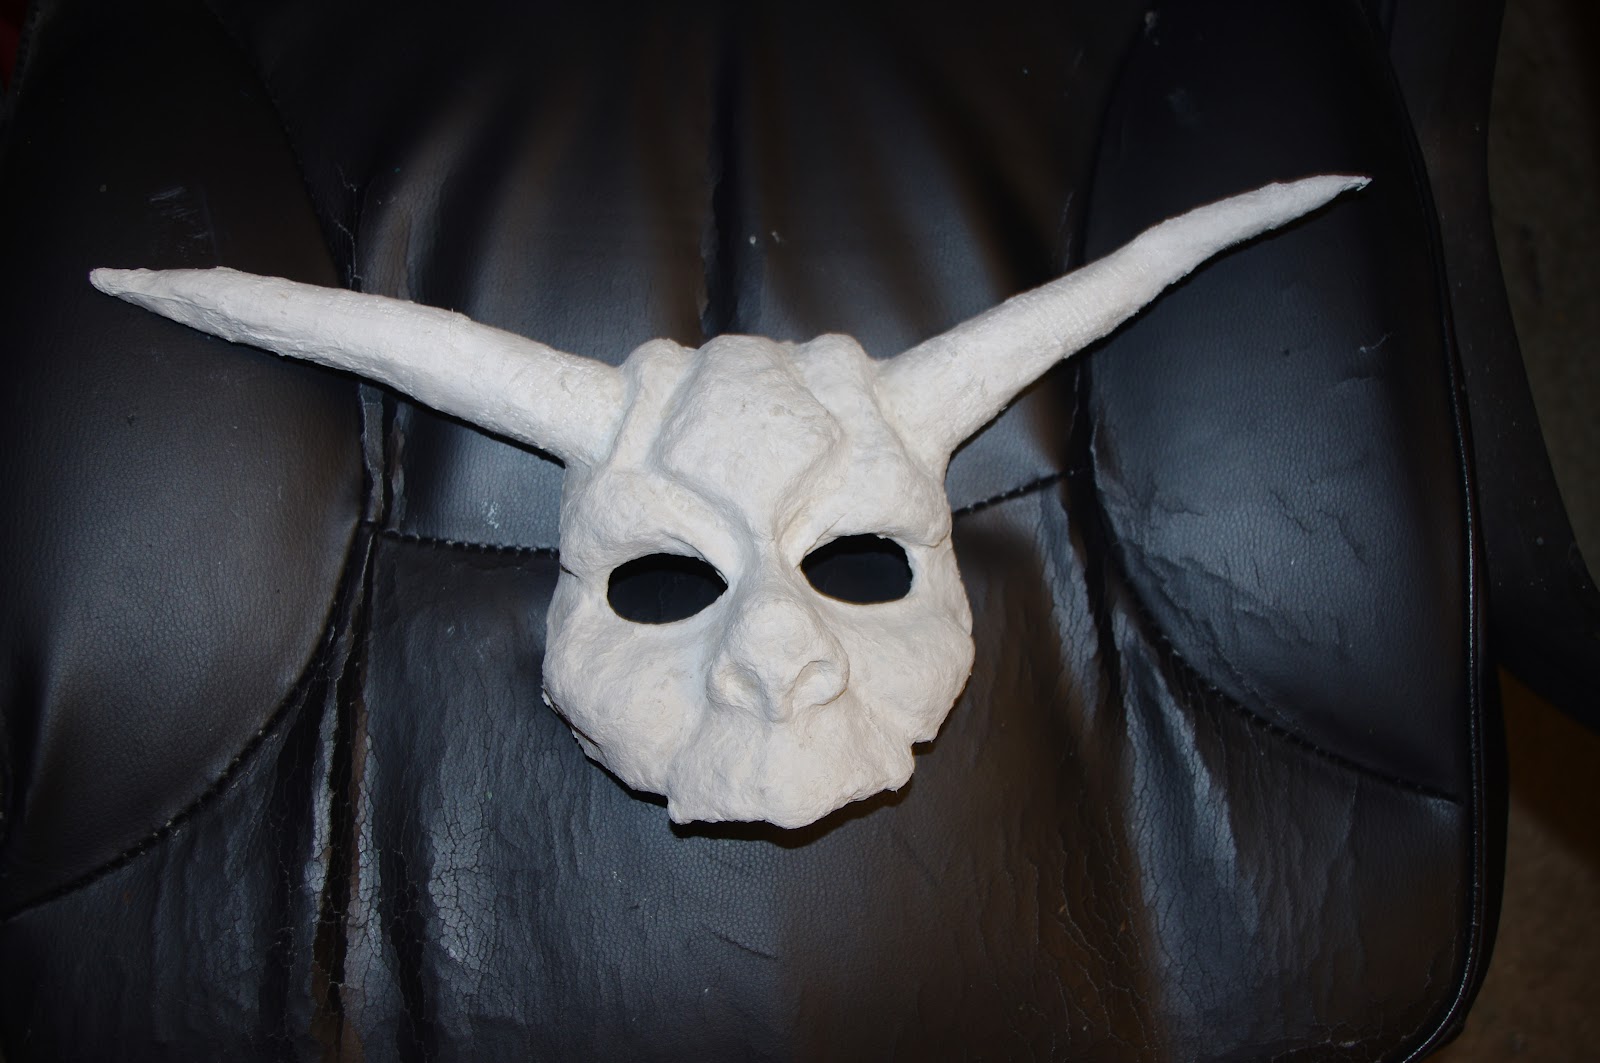
I decided I'd try to make the mask as light as I could, which proved difficult using the methods I prefer to create with. Still, I used thin layers of plasterwrap to keep the weight down as much as I could. I had to make a new horn mold because I misplaced the original one somehow. I was able to make the horn a lot thinner this time which was pretty cool not only for weight but accuracy.

I also tried a new sculpting compound for forming the shape on the mask, called Amaco Sculptamold. I can't say it was any easier to work with and it certainly came out just as lumpy as the Celluclay normally does. I have lots of sanding work to do on this one. I really need to find something entirely new that doesn't weigh a ton. I have tried Apoxie-Sculpt in the past year and it weighs a lot as well. All polymer clays weigh too much and paper clay always tends to crack on me. Totally open to all suggestions here!


Work in progress

In its current state, it's a lumpy mess, but the gesso + sanding will help that out. It would sure be nice to be able to skip that whole series of steps though. I attached the stick to the side of the mask first with hot glue and then further attached it with the modeling compound. I am likely going to go  over it again with some plasterwrap cloth pieces to ensure it sticks. I'm very nervous about it falling off. I searched for a ton of tutorials and could only find how to attach sticks to tiny little fabric masks, not something that weighs a pound or more.

I also opted for a thicker dowel instead of the thin one which would have looked better. I'd rather play it safe than sorry though and until I can get the weight down, it's just going to have to be this way!

Thanks for Reading and Happy Creating!
If you found this post helpful please share it with your friends! I also love a comment! You can get up to the minute updates by following me on Facebook by clicking here. 

Thursday, January 28, 2016

Why Not Add Painting to the Mix?


For as long as I've had this blog, I've kept the topic strictly to maskmaking. That can be a little tricky, especially when I'm not making and masks. I haven't been doing much of anything the past year or so as it seems everything in life has been hectic. I finally got off my butt and started working on some paintings recently though.

Within You - 18" x 24" acrylic on canvas
As many of you may know already from looking at my blog, I've taken a lot of inspiration from the movie The Labyrinth. I grew up with David Bowie being Jareth and his passing was really hard on me. I'm normally the type of person that doesn't care when celebrities die. I can't even count the amount of times I've caught myself tearing up though just listening to his music or thinking about any of many associations he has for me. I knew I had to paint him as homage for all the memories though. It wasn't much of a surprise that I settled on a shot of Jareth - specifically from the part when Sarah is in the stair Labyrinth at the end and Within You is playing. There is this part where it shows Jareth and he just looks so beaten as he realizes that he's never going to win Sarah over. It wasn't quite the same sentiment I was feeling, but the pain was certainly there in realizing he was never going to create again. I'm tearing at the eyes again writing this and I though the topic was finally safe! So below is the painting and I'm happy with how it turned out.

"Marie's Favorite 80s Fantasy Movie" wall
It's currently hanging on the wall in my living room. I noticed right away how empty the rest of the wall looked and I thought, 'I need to make more'. I decided that this would be a "Marie's Favorite 80s Fantasy Movie" wall. I set forth to create a layout that Jareth would be proud of. The set will include scenes from The Neverending Story, Legend, Willow, The Dark Crystal, and Ladyhawke. It will also be an ode to the lovable bad guy - which is to say there will be no "good guys" on this wall. Like I said, it had to be a wall Jareth would be proud of!

Keep posted for updates soon! And from now on this will be a painting and a maskmaking blog. I will have to update the about page soon, but for now I'm working on the next painting!

Thanks for Reading and Happy Creating!

If you found this post helpful please share it with your friends! I also love a comment! You can get up to the minute updates by following me on Facebook by clicking here. 

Wednesday, February 15, 2012

Labyrinth Inspired Goblin King Mask Part 2

This is part 2 of this post series - please check here to see part 1 if you haven't already read it.  


It's taken me forever to finish this mask partly because I've been working on several at the same time and also because I was very particular about the sculpting process. I also had to go through ordering a new Dremel after trying to find a replacement battery charger for a week or so! For better or worse. it's finished now! I don't have as many pictures as I'd like to have, but I can explain through the rest of the process.

I ended up covering the mask with modeling paste to smooth it out a bit more, and then painted a couple layers of white gesso on as well. Once all was dry I sanded it (with fine paper) and started painting in my actual colors. It was funny to use painting techniques I would usually use on a canvas, on a 3d surface!


I had already decided to make this mask more like that of worn copper. I wanted it to be very metallic as well. I mixed several colors for the facial part of the mask,and used a metallic gold/ brown color for the horns. Once these layers were set, I went in and added my shading which I used dark brown for on both accounts. In the below picture, you can see the difference in the horns, where the right horn has been shaded with dark brown while the other is still that bright gold color.


Once all of the coloring had been completed, I painted on a layer of matt varnish. And finally I found out why you have to wait 24 hours between layers or even before trying to do any work with it. Varnish takes forever to dry! And it's awfully sticky stuff! I was trying to do too many things at once because I was in a rush to get this blog post up after being sick, but I soon found that I couldn't rush it as this varnish even after 3 hours was still sticking to everything. So make sure you let your varnish dry! For future reference, I may just invest in some clear coats of acrylic paint so that I don't have to use varnish anymore for finishes.

Once the varnish finally did dry, I was able to attach some nose pads along with the felt lining and the elastic headband. You quite literally have to do this all at the same time and it can be a pain. When all is said and done, I really like the way this mask turned out. It has a personality of it's own which is what I like to go for with inspired masks. Not necessarily a direct copy, but a close brother of the Goblin King.


Thanks for Reading and Happy Creating!


If you found this post helpful please share it with your friends! I also love a comment! You can get up to the minute updates by following me on Facebook by clicking here. I'm also on Youtube now; please subscribe by visiting my channel here.
 

Tuesday, January 24, 2012

An Introduction to Mask Making and the Goblin King Pt 1 (Labyrinth)

An Introduction

Some of you may know me from my paintings. I used to keep up more of an blog face for Messina Studio, but have lately kept it to facebook updates and a website. I don't think I really enjoyed blogging about the painting side of art because most of the process is done behind closed doors between me and the painting, and without a video camera, it's hard to really ever get into it on a blog. I'm also not one to speak for any great length about a painting, or art for that matter. I've always been pretty blunt and to the point. I like it - I don't like it - I really like it - I like this color they used - etc. But I'm not going to go on and on and write lengthy blog posts about it. 

So you may be wondering what I'm doing here then? Well, I have found a new interest, and since I just started a week ago, you're not too late in joining me for the ride. I am doing a painting series on masked figures, called Veiled Intentions, and in doing so I spent a lot of time looking around on Etsy at different types of masks. I realized that the ones I really fancied were ones that I could never afford to buy in the $400-1000 range and so a thought dawned on me. What if I tried making my own?

Mask Making

I did...a lot of research..and I mean a lot! Here are just a handful of the links I've accumulated. Check them out for yourself if you're interested as I won't cover everything in this post.

Mask Making Ideas and Instruction
Different Papier Mache Methods (Pulp, Paper Strip, etc)
More About Making a Plaster Mask (Plaster Masks are good templates)
Papier Mache Resource (Has lots of great info- search the forums)

The Goblin King

The first mask that I wanted to try was based on the one that Jareth (David Bowie's character) wore at the masquerade in the movie The Labyrinth.

The Goblin King

I decided to go with making a plaster cast of my face to build on.  Once I had the basic shape of the mask, I let it dry and had no problem taking it off of my face. I realized pretty quickly that I wouldn't be able to get the shape I wanted with the plaster wrap alone. Then it was time to start doing some research on what to sculpt with. I told you there was a lot of homework involved! There are a lot of choices which is good but also makes the task arduous (I know..what kind of person uses a word like that on a blog..lol).

I decided I wanted to use a sort of paper pulp or paper clay to sculpt with but I couldn't find what I needed at Michaels (local craft store) and ended up getting Celluclay. This ended up not being such a horrible thing - Celluclay only needs some warm water added to it and it's very easy to sculpt with. I'll get more into this later. Here are some of my early pictures of the mask.

The first basic shape and layout of the mask.
The Celluclay has one downfall though if you apply it too liberally, it gets lumpy when it dries. I put it on pretty thick to make the bulges, so it got super lumpy on me! The good thing about Celluclay though is that it can be sanded. This helps to an extent, but you will most likely have to do some more to smooth it out.


 To add the ridges to the horns, I used para-cord paired with a glue gun and then used plaster wrap and celluclay accordingly to shape it up. I also had to fill in some of those lumps with more celluclay. I also added some little flaps off the side of the mask. This can be done easily by mixing card stock and plaster wrap together.


 Finally! It's starting to look a lot better! This was taken after I had sanded down the last layer of celluclay and added a full layer of gesso to the whole front of the mask. Some people suggest using a mix of string gel and modeling paste, but I know I can sand gesso as well, and until it's smooth enough that I think I won't want to sand it anymore, I won't use that mixture.

Since I didn't shape the mask perfectly the first time I did it, I've had to go back with a Dremel (hand tool) and drill/sand off the edges underneath the nose. Wouldn't you know that the battery died on the Dremel and I can't find the battery charger anywhere! They are also not available for sale anywhere unless you want to pay $50 on Ebay which really sucks. I will have to find another way to get it shaped the way I'd like - maybe just a lot of sanding.

After this whole experience, I found that I REALLY enjoy making masks! I think the most rewarding experience is working with my hands and creating something out of nothing. It's an amazing feeling and I think I'll be sticking with it! Keep an eye out for Part 2 of this post where I'll show the finished mask and painting it to look like tarnished bronze.

Thanks for Reading and Happy Creating!


Please share this post if you like it and follow me on my Facebook page - Marie Messina Art -  where you can see updates on both my paintings and my masks.